DIY Room Decor: Nail String Art
I was really busy this weekend, haha! No, I didn't do my homework. At all. Whoops. My best friend was redecorating her room and she really wanted to create a diy painting/decoration. I mean...who wouldn't love to have such a wonderful work of art hanging on their wall for the next few years? I bet you all would! Check out my video for some tricks before starting: http://youtu.be/8yr88J2IYiM

Thinking that you'll get into the idea of me making DIY posts, I decided to start with this tutorial. There's going to be also a step-by-step video a bit later.
There's no time to waste, let's get started!

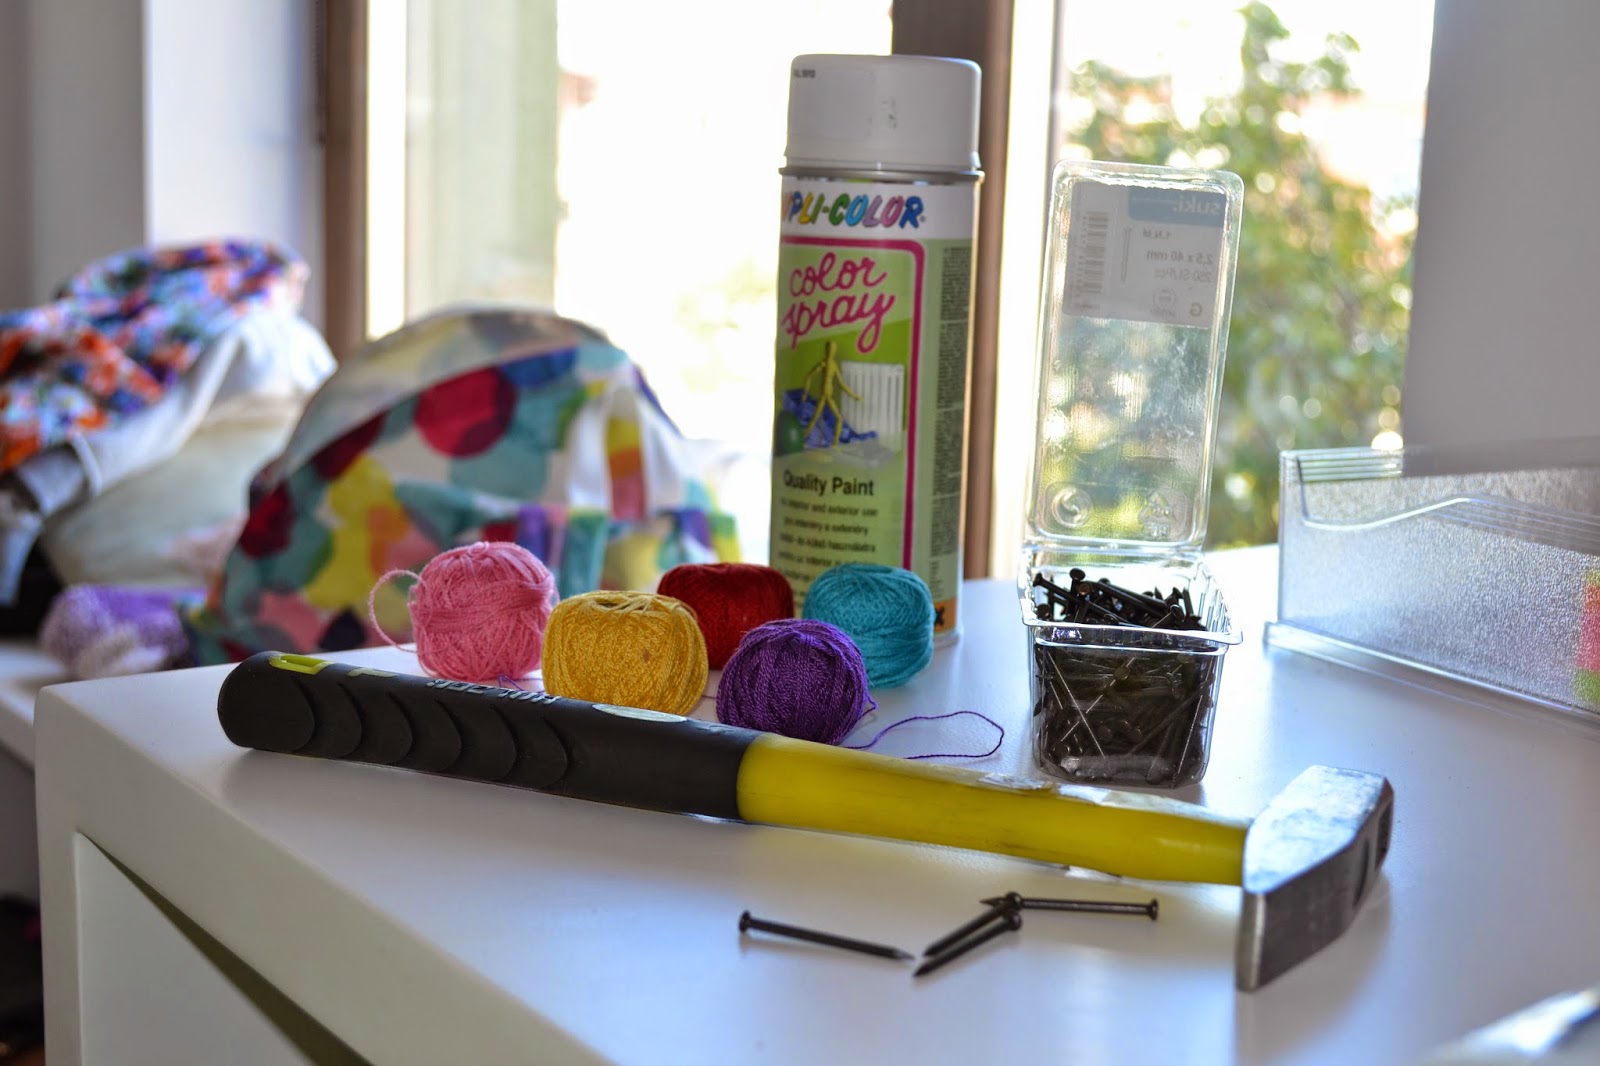
It' easy! All you need is:
- a piece of wooden board
- a couple of strings (you're choosing the style, so let your imagination spread and find the right colours for your creation)
- nails
- a hammer
- white spray
- a pencil and a ruler


Step 1: Draw
As your ideas invade your mind, let your hand go with the flow. Be inventive! Try something new, do whatever you want to! It's your idea, your style, your signature! My girl, well, she wanted something to remind her of dreaming. She always kept telling me that this work of art will remind her of the quote "If you can dream it, you can do it." So this is what we chose, the word dreaming. But you can choose any other word or shape.
Start by having a model of the shape you want to draw in front of your eyes. It's not necessarily, but I'm not good at drawing, so I really had to look at a model while trying to show off my draw skills.
Slowly, start to draw the margins of the word, don't hurry. You've got time!
Start by having a model of the shape you want to draw in front of your eyes. It's not necessarily, but I'm not good at drawing, so I really had to look at a model while trying to show off my draw skills.
Slowly, start to draw the margins of the word, don't hurry. You've got time!


 |
| This is Jazz! She was or little help, our secret ingredient for making things easier |
2. Start Outlining Your Word
It's your turn to see what it feels like to work like a carpenter, hahaha! Simply start by inserting the nails in the board with your hammer. They should push in fairly easily with a little pressure (except when you hit a knot in the wooden board...Try to avoid them as much as you can, I'm telling you this from my own experience! If a nail in pushed into a knot, it won't remain inside for too long. When the situation will begin to turn pink (4. Step), your nails will fall and you'll get soooo damn angry, that you won't be able to continue. This is your warning, guys! Avoid the dark knots in the wood!)


3. Paint your Board
Start spreading your spray all over the board from about 25 cm distance.


4. String your Canvas
Now the fun part: stringing.
Start doing roundabouts around the nails again and again. Reminder: be patient and don't rush!
P.S. We had a pretty thin strings and we had to do too many roundabouts around the nails, so we decided to make our work two times easier, in which we doubled the strings (we put two strings next to each other and started doing roundabouts with both, acting like we have a single string). This will help you, if your strings are also thin.


 |
| You can start with doing a knot on a nail, so that you'll make sure that you strings will remain intact |


 |
| AAAAAAND THIS IS THE RESULT What do you think about it? The time I wasted on this work of art wasn't wasted, right? |

Don't hesitate doing this at home, it isn't dangerous, even if you're working with a hammer and nails, it's cheap and you'll be very satisfied of what you did all by yourself.
I hope you enjoyed this post and I guess we'll keep in touch on Instagram.
Don't miss Take care!xx
Niciun comentariu:
Trimiteți un comentariu